Craving something crispy, cheesy, and full of flavor but not all the guilt? Baked chicken chimichangas are here to save your day! This dish packs all the punch of the traditional deep-fried version but cuts down on the grease by baking, offering a deliciously crunchy exterior with a succulent, flavorful interior. Ready to learn how to whip up this crowd-pleaser? Let’s get started!
What Is a Chimichanga?
The Basics
Originally from the American Southwest, a chimichanga is essentially a burrito that’s fried until crispy. It typically contains a savory filling, including meat, cheese, and beans. Our version, however, swaps the frying for baking, making it a lighter choice.
Why Chicken?
Chicken is a fantastic choice for a chimichanga because it’s lean, cooks quickly, and absorbs flavors beautifully. It’s also widely available and economical, making this dish a practical choice for families.
Gathering Your Ingredients
What You’ll Need
To make four servings of baked chicken chimichangas, you’ll need:
- 2 cups cooked, shredded chicken
- 1 cup refried beans
- 1 cup shredded Monterey Jack or cheddar cheese
- 1/2 cup salsa (your choice of heat)
- 4 large flour tortillas
- Olive oil or cooking spray
- Optional toppings: sour cream, guacamole, additional salsa
Choosing Your Tortillas
Opt for large, burrito-sized flour tortillas as they are easier to fold and hold the ingredients without tearing.
Preparing the Filling
Mixing the Ingredients
In a bowl, combine the shredded chicken, refried beans, cheese, and salsa. This mixture should be hearty and cohesive, with just enough salsa to keep it moist without making it soggy.
Assembling the Chimichangas
Lay out a tortilla on a flat surface, spoon a quarter of the filling into the center, and fold the bottom up over the filling. Fold in the sides, then roll the tortilla up from the bottom to form a tight cylinder. Secure with a toothpick if needed.
Baking Your Chimichangas
Getting Ready to Bake
Preheat your oven to 400°F (200°C). Line a baking sheet with parchment paper and place the chimichangas seam side down. Brush lightly with olive oil or spray with cooking spray. This helps the tortillas turn golden brown and crisp up in the oven.
Oven Time
Bake the chimichangas for 20 to 25 minutes or until they are golden brown and crispy. Keep an eye on them to ensure they don’t burn!
Serving Suggestions
Making It a Meal
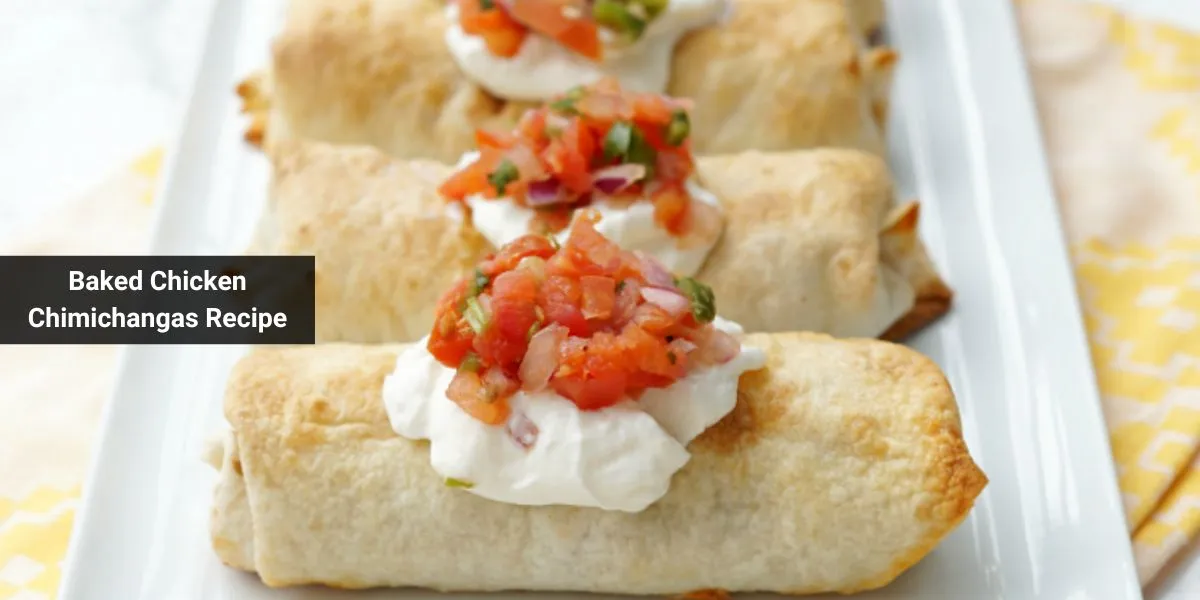
Serve your baked chimichangas with a side of rice, a fresh salad, or both! Don’t forget to add a dollop of sour cream and some guacamole on top for that creamy, cool contrast to the crispy, savory chimichanga.
Perfect Pairings
A cold beer or a tangy margarita pairs wonderfully with the spicy, savory flavors of chimichangas. For a non-alcoholic option, try a chilled glass of hibiscus tea or a refreshing limeade.
Customizing Your Chimichangas
Vegetarian Options
Swap the chicken for a mixture of grilled vegetables or black beans for a vegetarian version. You can also experiment with different types of cheese or add rice inside for extra heartiness.
Adding Heat
If you like things spicy, incorporate diced jalapeños into the filling or use a hotter salsa. Drizzling with hot sauce before serving can also kick up the heat.
Quick Tips for Perfect Chimichangas
Avoid Sogginess
To prevent your chimichangas from becoming soggy, make sure the filling is not too wet and that the oven is fully preheated before baking.
Crispy Every Time
Brushing the tortillas with oil and baking at a high temperature helps achieve a crispy texture similar to frying, without all the oil.
Conclusion
Baked chicken chimichangas are a delightful, healthier alternative to the traditional fried version, packed with all the flavors you love but with fewer calories. This dish is not only delicious but also versatile and easy to customize to your taste. Give it a try for your next meal; it’s sure to become a new favorite in your recipe rotation!
FAQ:
Q1: Can I make chimichangas ahead of time?
Yes! Assemble the chimichangas and store them in the refrigerator, covered, for up to a day before baking. Just add a few extra minutes to the baking time.
Q2: Can I freeze baked chimichangas?
Absolutely. Wrap each chimichanga individually in foil and freeze. Reheat in the oven at 350°F until warmed through, about 15-20 minutes.
Q3: Are there any low-carb options for chimichangas?
For a lower-carb version, try using low-carb tortillas or skip the tortilla altogether and make a “chimichanga bowl” with all the fillings.
Q4: What are some other protein options for chimichangas?
Beef, pork, and turkey are all great alternatives to chicken. You can use ground meats or slow-cooked and shredded meats.
Q5: How can I ensure my chimichangas are gluten-free?
Use gluten-free tortillas and check that all other ingredients are certified gluten-free, especially the salsa and refried beans.